Follow Pop Culture And Fashion Magic
Showing posts with label Makeup and Beauty. Show all posts

Saturday, December 5, 2015

Holiday Makeup Resolution

This year went by so fast - I can hardly believe December is already here. Since I’ve been working so hard, I want to take it easy this month, enjoy the party season and go out more. 

Dressing up comes natural to me, but due to my line of work I’ve actually become more and more interested in makeup and beauty too. That and the fact I’m getting older I guess.


It’s not like I don’t know how to wear makeup - I can do a mean cat eye in my sleep. The problem is I have a few everyday makeup looks that I always use and never really try anything different. I collected a ton of brushes, color pallets, blushes, lipsticks that I don’t even use all that much.

With the Holidays approaching fast I really want to try some new looks and go full glam. The two main problems are: the lack of time and my inability to decide what looks to go for. 

Not to mention there’s a different approach to putting on makeup every day for work, running errands and casually getting together with your friends and then getting ready for the office party at the end of the year or even more glamorous situations. For those who dabble extensively in makeup tutorials and products, knowing what to wear can be simple (just like I find it super easy to put together a really cool outfit in minutes). But what if makeup isn’t your cup of tea?


Really understanding the difference between looking natural and fresh for a family dinner and creating a striking look for New Year’s Eve is a matter of practice. Knowing to use makeup in your favor can be actually empowering. 

It’s all about skills and thankfully skills can be learned. It’s just a matter of practice and even beginners can get amazing results with their hair and makeup. Unless you want to be a doctor, you can pretty much become an expert by teaching yourself – that’s the beauty of internet – you can just Google it.

I rely heavily on my Pinterest boards and You Tube videos for inspiration. What colors should I use for a cool smokey eye and how can I apply and blend them to get the perfect result? What shade of lipstick would be better with that and my skin complexion? What hairstyle should I wear with my new glittery dress? Should I wear my hair in loose curls, try and updo, do some braids?

I find infographics very helpful when choosing a look to try out. The one below is one of the best when it comes to what makeup looks to wear for tthe Holidays and which are suitable for casual settings or more formal affairs.

TEMPTU Holiday Looks
Infographic
Angelic Faces: Holiday Makeup Looks Infographic Provided by TEMPTU


Are you guys into makeup or not really? Are you any good when it comes to applying it?

 Facebook / Bloglovin / Instagram / Pinterest / Tumblr / Twitter

Wednesday, May 28, 2014

How to get instantly long hair

This article is a lesson in “never say never”. Let’s start with the obvious – I have super long hair in these photos and we all know my normal hair is pretty short. 

Well guys, it’s not magic – it’s just hair extensions! And really great hair extensions if I can say so myself. And to think I have always dismissed them before – I knew hair extensions existed but was never really all that interested. Just like Jon Snow – I didn’t know anything.:)))

 
Instead, I was blaming my damn genes for not being able to provide Blake Lively or Selena Gomez type hair. I now realize I was delusional – there’s no way in hell that’s their natural hair. Now that my eyes have been opened, I could bet my life all those celebrities with heavenly hair wear extensions all the time. And my genes are perfectly fine, thank you very much! 

And since I got the rant out of the way, let me tell you a few things about all this hair on my head.:))) The extensions are Irresistible Me in Silky Medium Brown (#4), they are 20 inches long and the weight is 200 grams. They arrived very fast for an overseas order (the processing stage is 3 to 5 business days and the shipping another 2-4 days). They ship worldwide and the shipping is free for orders over $150 (otherwise you’ll have to pay $10 that are well-worthed since they use FedEx and the extensions will be delivered to your door). 

They are clip-ins and perfect for someone like me who doesn’t wear extensions on daily basis and just wants to put them on occasions. They have these little, sturdy clips that can be added in your hair in a matter of minutes (they are equally as easy to take off). They come in 10 wefts of different sizes (1 piece of 4 clips (8"/20cm), 2 pieces of 3 clips (6"/15cm), 5 pieces of 2 clips (4"/10cm) and 2 pieces of 1 clip (1.5cm) and there’s so much hair you can actually leave a few pieces out and only use part of them. The big weft is epic and has so much hair it can be used by itself and it’s going to look great. 


This is me before adding the hair extensions and thinking about how good I was going to look! :)

The best part is the hair itself – super soft, shiny and silky - so much so I have this crazy compulsion of touching it constantly. Fortunately, the shedding is minimal so that’s a problem just reported to my mental health. Being 100% human Remy hair, the Irresistible Me hair extensions can be cut, colored and styled without any problem as long as you take the same precautions you would with your own hair. Right here, I curled them because I wanted them to blend in perfectly. The ultimate goal was to trick everybody and make them believe I have breathtaking hair all on my own. And I think I did! The day I wore them everybody was looking at me with envy and/or lust!:)))))) I’m telling you, these are better than a boob job…a lot cheaper too (or so I heard:)))

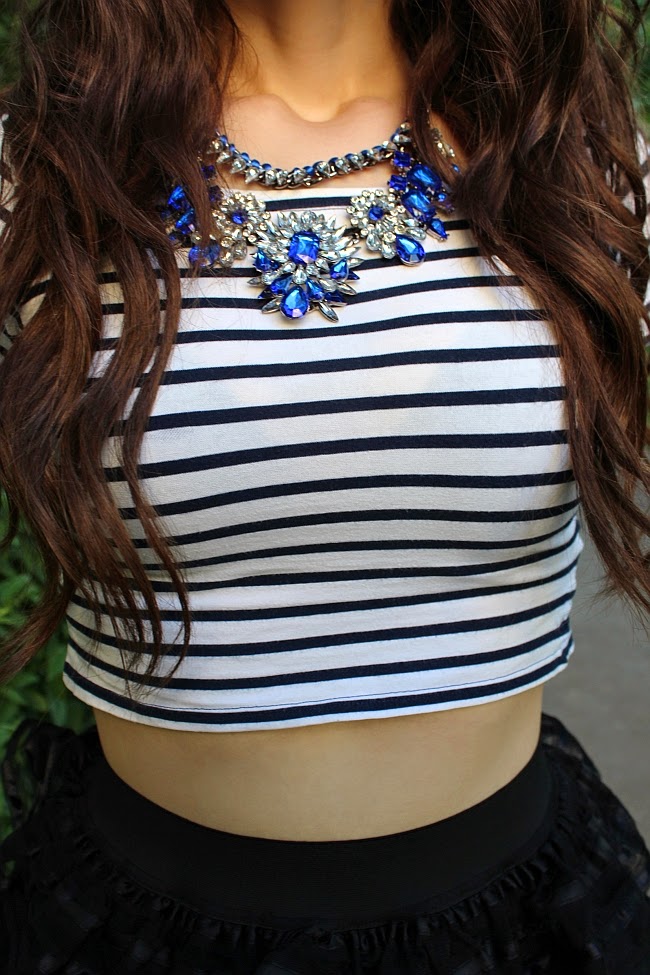
All the hair inspired me to wear this insane ruffled maxi skirt with a salsa vibe. I might have tried a few dance poses as well, but I decided to only share those via Facebook where people are expected to be crazy and ridiculous. I couldn’t help myself and I threw on my Borealy necklace as well – it’s so pretty, it seemed like the necessary topping on the cake (and by cake I mean myself :)).

Since I know an unsettling amount of things about extension from my sister, I feel it’s my patriotic duty to make an even more detailed review about my Irresistible Me hair extensions (I have a second blonde set that I wear as highlights or instant ombre depending on the mood) and show you how to put them in! Willing or not, you will be educated!:):):):)

 If you like the hair extensions and want a set for yourself, I have a a permanent 10% off coupon code for you for anything you like on Irresistible Me, just use IrresistibleAlice at checkout by adding it in the Promo Code box.

 
Nici nu stiu de unde sa incep, asa ca o sa zic o chestie super evidenta – am parul lung si ieri era de destul de scurt! Nu-i o minune – sunt doar extensii!!! Rar am fost atat de incantata de un lucru pe care il incerc pentru prima oara! Extensiile sunt o gaselinta de a carei existenta stiam, dar nu eram neaparat interesata. Le asociam cu aspectul artificial al tipelor care fac din solar, unghii lungi, silicon si botox un ritual zilnic. Dar zau ca m-am inselat! 

Acum imi dau seama ca majoritatea celebritatilor cu par superb pe care le invidiam din acest motiv (Blake Lively, Selena Gomez, Rhianna) au mereu extensii in par. Si cand ma gandesc de cate ori mi-am blamat genele ca nu se ridica la inaltimea asteptarilor mele legate de par si nu numai!!! Cu siguranta exista o multime de extensii care arata ieftin si nenatural, dar acestea din capul meu sunt 100% naturale si arata grozav. Sunt sigura ca cei care nu ma cunosc si nu stiu lungimea reala a parului meu, nu si-ar da seama ca am trisat.


The before and after pictures from behind (well, that sounds a bit dirty but you get the gist!)

Extensiile sunt de la Irresistible Me (gama Silky Touch), au 20 de inches (50.8 cm) si 200 de grame. Am ales culoarea Medium Brown si bine am facut pentru ca se potriveste aproape perfect cu nuanta mea naturala. Un alt detaliu important – sunt clip-ins - adica se ataseaza cu clipsuri micute in par si pot fi puse si scoase super rapid (chiar si eu le-am pus in aproximativ 5 minute). Mai mult dureaza ondulatul care mie mi se pare ca ajuta enorm cu partea de “camuflare” – asa chiar nu o sa stie nimeni ca podoaba capilara este doar partial a ta. Parul meu este subtire si capricios, dar foarte moale si stralucitor si extensiile acestea sunt chiar si mai matasoase si mai frumoase decat ma asteptam (egaleaza si chiar intrec aspectul sanatos al parului din dotare). Am tendinta sa le ating tot timpul si din fericire, nu cade parul din ele, altfel chiar ar fi o problema.

Fiind 100% naturale, pot fi tratate exact ca parul meu: le pot spala, tunde, vopsi, ondula, indrepta cu placa si asa mai departe. Fiecare set vine cu 10 bucati de diferite marimi: o bucata epica cu 4 clipuri de 8 inches (20 cm) si mai mult par decat am eu in tot capul, doua bucati cu 3 clipsuri de 6 inches (15cm), 5 bucati de 2 clipsuri de 4 inches (10 cm) si doua bucati de 1 clip de 1.5 inches (aproximativ 4 cm). Bucata mare este atat de grozava incat poate fi folosita si singura in zilele in care ma grabesc. Trimit colete in toata lumea (transportul este $10 sau gratis pentru comenzile peste $150) si spre deosebire de alte comenzi de peste ocean, acesta a ajuns super rapid si direct la usa cu Fedex (procesarea dureaza 3-5 zile si transportul alte 2-4 zile). Nu am platiti nici taxe vamale in caz ca va intrebati.


Daca va plac, am un cupon permanent de 10% pentru orice comanda pe Irresistible Me, este suficient sa folositi cuponul IrresistibleAlice la checkout in sectiunea promo code si veti primi reducerea!


Sincer, sunt obsedata de ele! Da, am ajuns si acolo – pot spune cu mana pe inima ca sunt obsedata de extensii! Daca va intereseaza o sa fac un review amanuntit si un tutorial in care sa va arat cum se pun! Datorita Sarei stiu nefiresc de multe despre acest subiect si ar fi pacat sa las nefolosita atata intelepciune – asa ca vrand, nevrand o sa va informez.

Parul lung m-a inspirat sa port pentru prima oara aceasta fusta maxi cu volane careia ii tot dadeam tarcoale de un an, dar fara mare succes. Ma tot gandeam cu ce sa o port ca sa evit sa arat ca o dansatoare de salsa putin nebuna. Cu toate precautiile am avut niste tentative de dans printre blocuri, dar am pus dovada doar pe Facebook unde este normal si asteptat sa fi putin ridicol:). Nu putea sa lipseasca colierul Borealy pe care il port atat de des incat ati putea crede ca-i singurul meu colier! :)

So what do you think? How do you like me best - with shorter or longer hair?

 I’m wearing:
hair extensions / extensii - Irresistible Me
  skirt / fusta - Asos
crop top/ top scurt - random brand (very similar here)
leather jacket / geaca piele - random brand
 necklace/ colier - Borealy
  rings /inele - here


Friday, June 14, 2013

The wonders of make-up


In the storm of things I have to do lately I somehow managed to squeeze a make-up session as well. I always find time for something fun, but I do wonder how married women with kids manage to do everything since I feel I don’t even have time to breathe in a normal week.

Going back to the point - last week I was invited to visit the Make-up Art Studio and the meeting was lovely, more like a sleepover party (minus the pajamas). 

Like most women I’m powerless in front of beautiful things so you can imagine how nice it was to be surrounded by all the colorful makeup pallets, powders, lipsticks, creams and brushes. There were lots of wonders there - many of which I had no idea what they were or even how they were called.

All I know is that I need and want them all (insert evil laughter:))))!


This dress is my new love - it has a spectacular print: giraffes and tigers on silk with a gold necklace applied in the neckline area!

After getting a professional "makeover" I realized that my makeup skills are kind of limited. While I do know how to apply minimal makeup in order to look OK I have a lot to learn if I want to use makeup at its full potential. I will try to do that in the near future now that I know it can make a real difference. And even though I’m not the kind of girl that goes all out every time she leaves the house, there are moments when I feel I can do more! So challenge accepted!    
    
My conviction that I need a vanity table with spots on the mirror was reinforced now that I got the chance to be in front of one. 

What I got done here was a version of smoky eyes that I loved. Adela Manolache, who is such a lovely and talented person, was kind enough to share with me some tricks about make-up that I will surely use in the future.

I really liked how she accentuated my eyebrows. I’ll be honest – I’ve never done it myself! I think it can go really fast into chola territory, but after this I’m reconsidering  that (if done right they can look great). 

Can I please have my own personal make-up artist Rachel Zoe style now?!! The experience of someone doing it for you it's wonderful! 
  
The before and after photos - douchy "in the mirror" edition!

In case you missed it - this is my mysterious meets seductive meets diaphane look! I'm convinced  you are all powerless now!
I’m wearing:
dress, earrings / rochie, cercei - Romwe
bag / geanta  - Debenhams
gladiator sandalas / sandale gladiator - New Yorker
    gold belt / curea aurie -  New Look
rings / inele  - New Yorker and Koton

  
 How do you guys like me all dolled up?


Wednesday, March 13, 2013

Makeup - hot pink eyeliner

I’m starting a new column on this blog (Makeup&Beauty) and it’s all because of you. I’m always happy to get your emails and comments with feedback, questions, ideas and suggestions so keep on sending them this way. 

I always wanted to experiment a little more with my makeup and daily beauty routine so this is an excellent excuse to just do it. Don’t expect this to be the work of an expert, it going to be more of a reality show of someone who only knows the basics and wants to get creative in spite of that. 

Take this first look I wanted to show you - it’s a play on a classic eyeliner makeup and you can recreate it in 5 minutes tops. The star of the show is the hot pink eyeliner applied under the eye in a thick line and accentuated with black kohl. The lid is even simpler: just one color (a very subtle gold) with a lighter shade in the corner of the eye. A bit of blush, black mascara, a nude lipstick and you’re ready to go!

I listed the products I used below, but you can basically use anything you have around in your makeup bag. I hope you like it!
Feel free to write us anytime!

 The crazy eyes are my trademark so you'll see plenty of them in the  new column!

In mod absolut surprinzator primesc o multime de emailuri si intrebari legate de modul in care ma machiez! Din acest motiv am decis sa inaugurez si o rubrica de makeup si beauty pe blog – nu stiu inca de cate ori pe luna o sa scriu despre aceste subiecte, dar o sa o fac constant si o sa incep cu articolul de fata.

Nu sunt experta in machiaj, nici macar intens pasionata, dar stiu suficient de multe incat sa ma pot aranja singura si sa arat ok.
Cu siguranta veti gasi bloggeri care scriu exclusiv despre machiaj si beauty si o fac mai bine decat mine si la un nivel de executie si originalitate mai mare decat o pot face eu (cu machiaje creative si complicate, tutoriale amanuntite, multe review-uri), dar pentru ca exista interes sunt fericita sa impart cu voi ceea ce stiu eu. 

Practic ceea ce propun sunt idei care pot fi aplicate in 5-10 minute, cu usurinta si fara sa fie nevoie de indemanare iesita din comun.
In plus mi-am propus sa fiu mai creativa cu partea de makeup si cred ca asta este o ocazie excelenta sa fac acest lucru.

Cum tusul este unul dintre putinele lucuri de care nu ma pot desparti m-am gandit ca ar fi potrivit sa va arat o variatie pe aceasta tema:  un machiaj cu tus roz intens aplicat jos in linie groasa, accentuat cu creion khol in interior si o pleoapa simpla acoperita cu fard intr-o sigura culoare (si fard alb-auriu aplicat in coltul ochiului pentru a lumina privirea). Cam asta este tot – aplicati, rimel, putin fard de obraz, pudra iluminatoare si un ruj nude si sunteti gata.

 In rest ne puteti scrie orice pe adresa fashionmagicsara@yahoo.com !


O sa listez produsele pe care le-am folosit eu, insa puteti reface mchiajul cu ce aveti voi in trusa personala – puteti folosi culori apropiate si va incurajez sa experimentati si cu alte culori de tus. Mi-ar face placere daca ati trimite fotografii in cazul in care l-ati incercat intr-o zi in care doreati ceva putin diferit, dar extrem de usor de realizat.

The products I used /  Produsele folosite:
Garnier B.B Cream Miracle Skin Perfecter (Light)
Jillian Dempsey Avon blush
Wet n' Wild  Mega Glo illuminating powder (catwalk pink)
W7 hot pink eyeliner
Loreal Lash Architect mascara
Black kohl pen (Avon)
Maybelline Silk glam Eye Studio quad eye shadow (give me gold) - first color used
Gold eye shadow powder - random brand
Elite professional brushes
I forgot to add the lipstick I used in the picture (next time) - but it was a Dior Addict lipstick (Nude)


I hope you like it! Any thoughts?  


Wednesday, January 25, 2012

Hair goes retro

I really love the 20’s inspiration in clothes and hairstyles this season. I’m usually not what you would call a trend chaser but I’m just dying to try the waved flapper bob hairdo.

“The Great Gatsby” is one of my favorite books so I guess that’s the main reason I fancy myself as a modern Daisy Buchanan. And since I already have the bob, I might as well wave and tousle it. Easy to say, but it seems so complicated to actually get the look.


Right about now I could really use some really fancy hair styling tools. Just look at the pictures of Katy Perry taken by David LaChapelle for the product launch! So very provocative! My birthday is only 10 months away! Just sayin’!:)))

Do you like the waved flapper bob? Would you ever wear it?

Saturday, October 8, 2011

The cross nails tutorial:)

I finally got around doing that tutorial I promised you a week or two ago: the cross nails tutorial. The feedback regarding this rock&roll inspired nails was overwhelming: I don’t remember getting so many compliments on my nails ever before (not even with the half moon nails). I don’t know if this has been done yet, I imagined so – nowadays truly original ideas are almost extinct; and even if you think you had one be sure somebody in Australia or another corner of the world thinks the same about the same idea :)))).
Enough said, here are the steps, it’s not that hard and remember: practice makes perfect.

Am terminat in sfarsit tutorialul cu unghiile cruce, de inspiratie rock&roll pe care vi l-am promis acum ceva vreme. Nu este deloc complicat, aveti nevoie mai degraba de putina rabdare, doua culori contrastante de oja, hartie adeziva si o foarfeca.:)


Step 1. Apply the base color (the color of the “cross”). Wait for it to perfectly dry! I choose a classic black and white and, on another occasion, yellow and black. You can be as creative as you feel like, just remember the base color has to be lighter so that the color you apply after can cover it.

Aplicati culoarea de baza (practic culoarea crucii)! Asteptati sa se usuce bine! Puteti alege orice culori doriti, insa nu uitati ca, cea de-a doua culoare, trebuie sa fie mai puternica si sa o acopere perfect pe prima.


Step 2. Use adhesive paper or label type paper and cut it in long stripes, then apply it on your nails in the shape of a cross (be sure the stripes are not too wide). Also make sure they are well glued (don’t worry about the stripes going over the actual nail, it’s better this way, you’ll take them off easily after applying the second color)!

Folositi hartie adeziva sau hartie pentru etichete (se gaseste in orice librarie) pentru a taia fasii lungi si subtiri, dupa care lipiti-le pe fiecare unghie astfel incat sa rezulte o cruce, asigurati-va ca sunt bine asezate si perfect intinse si lipite! Este in regula daca depesesc putin unghia, din punctual meu de vedere este chiar recomandat, astfel veti putea dezlipi mai usor dupa.


Step 3. Apply the second color of nail polish. Wait for it to perfectly dry.
Aplicati a doua culoare de oja si asteptati sa se usuce bine!


Step 4. After making sure the nail polish is dry just take the stripes off.

Dezlipiti fasiile de hartie dupa ce v-ati asigurat ca oja este complet uscata (eu am lasat-o mai mult de 30 de minute sa se usuce ca sa fiu sigura ca totul urma sa fie in regula)!


Step 5. Use nail polish remover to clean the excess nail polish. I ‘m usually super messy and this step is vital for the final effect.

Folositi acetona si un betisor de curatat urechile pentru a indeparta excesul de oja.


Step 5. You’re done! Admire and put a ring on it!:)))). High five for a job well done! Gloat!:))))
Rasuflati usurate – sunteti gata!


What do you think? Ce parere aveti?


Wednesday, August 17, 2011

The half moon nails tutorial:)

I know this type of nails has been done before but many of you asked me how I’ve done it so here’s a very simple photo tutorial. I guess my only contribution to this technique is that I used these little red adhesive dots that are meant for something completely different but are very useful and inexpensive (you can find them in any school supplies store).

You can choose any two colors you want, just make sure they go well together. I also wanted the “half moon” to be bigger and rounder than usual and the little dots are perfect for that.

Stiu ca tipul acesta de unghii nu este nou, dar am decis sa fac un tutorial rapid (in imagini) pentru ca am primit o multime de mailuri si comentarii cu intrebari legate de acest subiect. Consider ca singura informatie cu adevarat noua este legata de forma pe care am folosit-o ca sa obtin “semiluna” din josul unghiei. 

Ei bine, am cumparat niste cerculete rosii autoadezive care se gasesc in orice librarie bine aprovizionata pe care le-am taiat in doua (ele sunt menite pentru cu totul altceva, dar mi s-au parut perfecte mai ales ca doream o “semiluna” mai mare si mai rotunda decat cele pe care le-am vazut in alte tutoriale, practic un semicerc:))). Puteti folosi orice combinatie de culori, eu am ales alb si roz intr-o nuanta de acadea.

 
Step 1. Apply the base color (the color of the “half-moon”). Wait for it to perfectly dry.
Aplicati culoarea de baza (practic culoarea semilunii)!Asteptati sa se usuce bine.


Step 2. Cut the dots in half and apply them on the bottom half of each nail. Make sure they are well glued!
Taiati cerculetele adezive in doua si lipiti-le pe fiecare unghie in partea de jos, asigurati-va ca sunt bine asezate si perfect intinse!


Step 3. Apply the second color of nail polish. Wait for it to perfectly dry.
Aplicati a doua culoare de oja si asteptati sa se usuce bine!


Step 4. After making sure the nail polish is dry just take the dots off.
Dezlipiti semicercurile dupa ce v-ati asigurat ca oja este complet uscata!


Step 5. You’re done! Admire and put a ring on it!:)))). High five for a job well done! Gloat!:))))
Rasuflati usurate – sunteti gata! Se servesc cu inele colorate!:)

How do you like it? This was my first try, I'm pretty sure next time will be even better!:)


AddThis Smart Layers

Related Posts Plugin for WordPress, Blogger...